Feeds:
Posts
Comments

Posts Tagged ‘recipe’

I didn’t realize how many drafts were in my blog. I will be posting them to share the fabulousness I made last year and to make room for new posts!

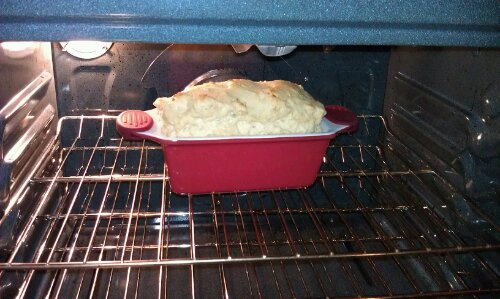
03/03/12 Not exactly what I had in mind when I shook the bread pan to get the bread out but it tasted great anyway. Just not as pretty as I had hoped. I ended up eating the ENTIRE section that is missing, immediately before this picture was taken which was a very short time after it came out of the oven. MMMMmmmmm. I really thought that making bread would be this huge deal and it would be impossible. This was my second bread and neither of them was too difficult and came out delish!

Third bread making experience went a lot smoother on 3/10/12….the bread looks perfect, tastes even better and I finished the entire loaf. No slicing and freezing any of it. This bread has a tendency to stick way more than the quinoa sesame bread, which was my first bread experience. I think next time I will oil the pan a bit more and hope that helps.

Since this post is almost a year old, I have learned in that time that oiled parchment paper in the bottom of the pan is the way to go!

Look at this beauty!!
image


image

Recipe Timeeee:

This is from my favorite GF cookbook Gluten-free Makeovers by Beth Hillson. She is so seriously brilliant it hurts my brain.

Called “Delicious Slicing Bread”

3 1/3 cups Bread Flour #1 (recipe listed below)

1/2 cup nonfat dry milk powder, or substitute

1/2 cup lightly packed light brown sugar (I used brownulated)

2 1/4 teaspoons instant active or dry active yeast

1 1/2 cups plus 2 tablespoons water (105° to 110°F)

2 large eggs

1/4 cup vegetable oil (I used canola)

Spray or oil an 8 1/2 x 4 1/2-inch or 9×5 inch loaf pan.

In the bowl of a heavy-duty mixer, add flour blend, milk powder, brown sugar, and yeast. Mix to combine. Mix together the water, eggs, and vegetable oil in a separate bowl. Add to the dry ingredients. Beat on low for 1 minute. Beat on medium-high speed for 3 minutes or until the mixture is smooth, shiny and has thickened.

Scrape dough into prepared pan. Cover with lightly oiled plastic wrap and set in a warm draft-free area until the dough rises to the top of the pan.

Preheat the oven to 375°F. Remove plastic wrap and bake on the middle rack for 40-45 minutes, until the top sounds hollow when tapped and the internal temp reads 190-200°F.

Remove and turn out onto a wire rack. Cool completely before slicing.

If you do not finish all of the bread in 2 days slice and freeze it.

Bread flour #1 recipe

1 1/4 cups white rice flour or brown rice flour

1 1/4 cups sweet white sorghum flour

1/2 cup amaranth flour

3/4 cup cornstarch or tapioca starch

3 tsp xanthum gum

1 tsp salt

Read Full Post »

Get ready for a barrage of beautiful pictures! This bread is just so photogenic I couldn’t stop taking them!

HEAVEN, this bread is utterly ridiculous! Want to know one of the best things about it?? It’s DAIRY FREE! Wooooo, I know some of my friends who are GFCF are going to be happy about this one 🙂

So, it’s delicious, gluten free, dairy free and has healthy ingredients? What alternate universe did I fall into? Beth Hillson’s universe, the author of Gluten-Free Makeovers. She is so brilliant, I can’t take it. Maybe she has super powers or is a wizard or a witch or something magical; so anyone who cooks her recipes falls under her spell.  OMG, it’s mind control! Aahhhh. No, really though. She is amazing. I have LOVED every single thing I have made from this book and can’t wait to find out what other gems are in there! Here is a link to it on amazon: http://www.amazon.com/Gluten-Free-Makeovers-Recipes—Goodies–Made-Deliciously/dp/0738214612/ref=sr_1_1?ie=UTF8&qid=1332123445&sr=8-1 (I don’t make any money off of this, just want to share the wealth of deliciousness.

This is the second time I have made this bread, and somehow it is better than it was the first time. I can’t express how much I LOVE this bread. The texture is perfect, the taste is unique; and I will bite your arm off for trying to take some of it. Not advisable.

It takes a bit longer to rise than the other bread I blogged about, so you definitely need a little more patience for this one.

Recipe for Sesame Quinoa “Wonder” Bread:

1 to 2 tablespoons sesame seeds

1 1/8 cups quinoa flour

1 cup cornstarch

1 cup plus 1 tablespoon tapioca starch/flour

3 tablespoons brown sugar

3 1/2 teaspoons xanthum or guar gum

1 1/2 teaspoons salt

3 large eggs, lightly beaten

1 1/8 cups warm water (105°-110°F)

3 tablespoons olive or vegetable oil (I used canola)

2 1/4 teaspoons instant active or active dry yeast

*Lightly oil a 9×5 loaf pan

*Heat a skillet over medium heat. Add sesame seeds and stir until they begin to brown. Remove and cool.

*In a large mixing bowl, combine sesame seeds, quinoa flour, cornstarch, tapioca starch/flour, brown sugar, xanthum gum, and salt. In a separate bowl, combine eggs, oil and water. Add the liquid ingredients and the yeast to the dry ingredients and beat for 2-3 minutes on medium speed until mixture is smooth. Dough will be thick.

*Scrape into the prepared pan, using a lightly oiled spatula to smooth the top. Cover with oiled plastic wrap and let rise to the top of the pan. About 40-60 minutes. (It takes longer for me, more like 90)

*Preheat the oven to 350°F. Bake for 40-45 minutes. Turn onto a wire rack and let cool completely before slicing.

*Slice and freeze any remaining bread after 2 days.

Read Full Post »

Gorgeous aren’t they?? They are quite possibly my favorite cookie ever. M also totally endorses them, he has had to stop himself from eating all of them and save some for me! They are crispy around the edges and soft and chewy in the middle. Heaven, pure heaven. The recipe said it would make 4 dozen but I made them a little bigger and got out 30ish. I also threw in a few craisins as well as golden raisins.

This recipe comes from the super awesome book “The Gluten Free Bible”, I am a huge fan of the recipes I have made from this book so far. All Amazing!!

1 3/4 cups Gluten Free All Purpose Flour Blend (they have a recipe for a blend, I just used the Bobs Red Mill gluten free flour)

2 tsp baking powder

1/2 tsp xantham gum

1/2 tsp salt

1 cup (2 sticks) butter (or dairy free margarine to make this recipe GFCF)

1/2 cup granulated sugar

1/2 cup packed brown sugar (I only have brownulated so I used that)

1 egg (you probably could use egg substitute to make it vegan also with the dairy free margarine)

1 tsp vanilla

2 cups flaked coconut

1 1/2 cups rasisins

1. Preheat the oven to 350°. Line cookie sheets with parchment paper if your cookie sheets aren’t non stick

2. Combine flour blend, baking powder, xantham gum, and salt in medium bowl, whisk to blend.

3. Beat margarine ad sugars in large bowl with electric mixer at medium speed about 2 minutes or until well blended. Beat in egg and vanilla. Add flour mixture; beat at low speed about 30 seconds or until just combined. Sir in coconut and raisins. Drop dough by rounded tablespoonfuls 2 inches apart onto prepared sheets.

4. Bake 10-12 minutes or until brown around edges (centers will be light). Remove to wire rack, cool completely.

So, I am not the most graceful person in the kitchen always but I almost gave up part of the way through with these cookies. My electric mixer just kept mixing the butter up onto the whisks and I had to stop every two seconds to scrape it back off. I ended up mixing by hand for a lot of it. The prep for these ended up taking me a lot longer than it should have. Cookie dough is quite hard to stir…duh, I forgot.

Oh, and the parchment paper thing, that was a cute little ordeal also. I own non stick (I know they are terrible, enough, stop it, seriously) cookie sheets, so I lined them with parchment paper because the recipe says to. The paper kept sliding everywhere and then I realized you probably don’t need it if they are non stick.

So, yes I can do Organic Chemistry, but baking baffles me. These cookies were amazing, as I have mentioned before a few times, so if I can do it being a baking dummy, anyone can!

enjoy!

Read Full Post »

Meat and Potatoes…..I think there was a mistake and I was supposed to be a guy. Look at this meal, in all fairness I only ate the steak, skins and some peas in that one sitting; the casserole I have saved for another time. I didn’t take any pictures while cooking but my final pictures are so awesome I can’t contain myself.

I had been craving potato skins for what seemed like weeks. It had to be done. They aren’t the most healthy thing I have made but I baked them so they definitely aren’t as bad as the ones you would get in a restaurant.

I used this recipe: http://simplyrecipes.com/recipes/potato_skins/

Went by the letter of the recipe, so there are no changes or tweaks to post. They were, fabulous! Perfect texture, and mouth watering.


So now I had to figure out what I wanted to do with the scooped out insides. I followed along the same theme so I could split my supplies between the two recipes. Instead of having to buy additional other ingredients I just bought a larger amount of the ingredients I was already using. yay!

Recipe Link: http://www.food.com/recipe/twice-baked-potato-casserole-26043

I used way less sour cream, bacon, cheese and added dried chives to the sour cream layer.  I was using the scooped out insides of 5 large potatoes instead of 6 whole potatoes. I wasn’t sure how to alter the recipe for that but I figured recipe or not if I threw bacon, sour cream, chives, potato and cheese together it would be delicious no matter what. I haven’t tried that one yet because I had the skins and steak, but from the looks on M and Mom’s faces when they took their first bite it is pretty damn delicious!!!

I LOVE hanger steak. It is by far my favorite steak ever. I don’t have a knack for cooking steak especially when in a rush and in pan on the stove. I am for sure not giving any tips on how to cook meats, one day I hope to get to the point where I am way more comfortable with it. So, although it isn’t gorgeous it did still taste wonderful!!

Here is my whole meal together:

Read Full Post »

I bought potatoes yesterday to make potato skins to go with the Hanger steak I have. I was way too tired yesterday to do all of that so I ended up making bean and cheese tacos ftw.

I grabbed the soft corn tortillas yesterday at the food store while I was picking up other items needed for the potato skins. This quick dinner consisted of 6 corn tortillas, cheddar cheese, a can of refried beans (only used a small amount of it), 2 scallions, some frozen corn, avocado and sour cream. I took these out of the fridge and cabinets and went to work . My food was done in 10 minutes; it was great to be able to have a dinner option that I didn’t have to slave over for hours to eat!

BONUS: there were already neatly cut up components to this meal in containers for when M got home from work!! Score for me, and clearly him 🙂

I steamed the corn for a few minutes, nuked the beans, cut up my scallions and avocado, toasted the tortillas on a hot pan for 20 secondsish, grated the cheese right onto the top and plopped on some sour cream before I wrapped it up.


Thanks mom for mentioning refried beans and letting me steal the rest of your frozen corn :), then I figured out how to do this in almost no time.

It’s definitely not like this is rocket science, but when all familiar things are gone (or you think they are) it become almost foreign to eat without it being a giant production. I have to gear up to think about gluten free food. Not think thoughts like, “Since now I am eating gluten free everything I know and love is gone and I can’t have anything I like”. Waaaaaaaa.

There are still a ton of options for me and anyone else with food restrictions, sometimes we just need to get a little more creative.

Food restrictions are one of the toughest treatment protocols to follow.

Tell me to take nasty medicine, fine. Tell me to have a PICC line put in and inject myself with antibiotics everyday, fine. Tell me to get a spinal tap, fine. Tell me to take 45 pills a day, fine. Tell me to go to a minimum of 2 Doctors every week for YEARS, fine. Tell me not to eat gluten or dairy or whatever it is and “Oh, there is no way in hell I can deal with that!!” “It’s too hard, I can’t handle it”. Haha

I remember crying in a doctors office when they told me I should stop eating dairy because I couldn’t imagine my life without ice cream…..guess what I still haven’t given dairy up, oh lactaid pills I love thee. I know, I know, one day I will give up dairy fully, but for now gluten is the major enemy and I think I am finally in the right state of mind to build up my arsenal to fight this battle and win gracefully.

Peace.

Read Full Post »